Hands On: Joining an Event Stream with a Table on Confluent Cloud


Michael Drogalis
Principal Product Manager (Presenter)
Hands On: Joining an Event Stream with a Table on Confluent Cloud
In this exercise, you will build and observe the behavior of a stream-table join in ksqlDB.
Before continuing, ensure that you have access to a Confluent Cloud cluster and a ksqlDB application within it. If you don’t, see below.
-
Go to Confluent Cloud and sign up for an account if you don't already have one. You can use the promo code KSQLDB101 for $25 of free usage (details). This will be enough to follow this exercise as written, but please make sure to delete your cluster and particularly your ksqlDB instance when you are finished so that you don't incur extra charges, as outlined below.
-
Create a new cluster in Confluent Cloud. For the purposes of this exercise you can use the Basic type. Name the cluster inside-ksqldb.

-
Now go to the ksqlDB page within your Confluent Cloud cluster and click Add application.
If prompted, select Create application myself.
Leave the access control set to Global access. Give application name as inside-ksqldb, and leave the number of streaming units set to 4.
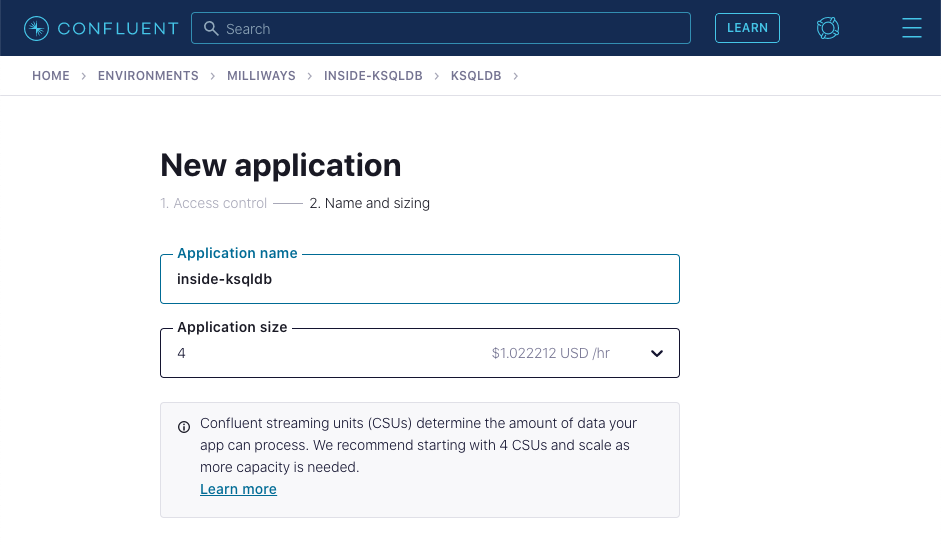
The ksqlDB application will take a few minutes to provision.
-
Navigate to the ksqlDB application.


Create the source objects
Run the following two ksqlDB statements in the ksqlDB editor and confirm that both complete successfully.

-
A stream of events holding data about readings received from a sensor:
CREATE STREAM readings ( sensor VARCHAR KEY, reading DOUBLE, area VARCHAR ) WITH ( kafka_topic='readings', value_format='json', partitions=3 ); -
A table holding information about the brand name of different sensors:
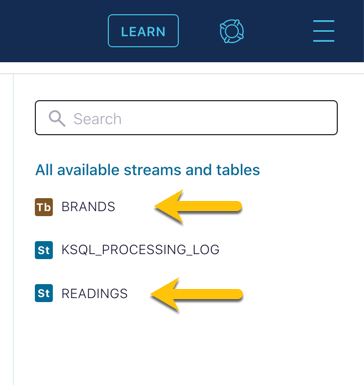
CREATE TABLE brands (
  sensor VARCHAR PRIMARY KEY,
  brand_name VARCHAR
) WITH (
  kafka_topic='brands',
  value_format='json',
  partitions=3
);
On the right hand side of the ksqlDB editor you should see the new stream and table listed:

Populate the table
A table in ksqlDB is often populated using data streamed into a Kafka topic from another application or Kafka Connect. Tables can also be populated directly, using the INSERT INTO statement, which is what we’ll do here. Run the following statements in ksqlDB. You can run them individually or as multiple statements together.
INSERT INTO brands (sensor, brand_name) VALUES ('sensor-1','Cassin Inc');
INSERT INTO brands (sensor, brand_name) VALUES ('sensor-2','Carroll Ltd');
INSERT INTO brands (sensor, brand_name) VALUES ('sensor-3','Hirthe Inc');
INSERT INTO brands (sensor, brand_name) VALUES ('sensor-4','Walker LLC');
You can check that the data has been written to the table by querying it. Make sure you have set auto.offset.reset to earliest using the drop down menu:
SELECT *
  FROM brands
  EMIT CHANGES;
Note that it can take around thirty seconds for the data to be returned to the screen. When it is, you can switch between how it is rendered using the icons to the top right of the data.

Populate the stream
Insert some events into the readings stream by running the following:
INSERT INTO readings (sensor, reading, area) VALUES ('sensor-1',45,'wheel');
INSERT INTO readings (sensor, reading, area) VALUES ('sensor-2',41,'motor');
INSERT INTO readings (sensor, reading, area) VALUES ('sensor-1',92,'wheel');
INSERT INTO readings (sensor, reading, area) VALUES ('sensor-2',13,'engine');
Run the stream-table join query
Now you can run the stream-table join and see it in action.
Tell ksqlDB to processes all messages from the beginning of the stream by setting auto.offset.reset to earliest in the drop down menu:

SELECT r.reading,
       r.area,
       b.brand_name
FROM readings r
INNER JOIN brands b
ON b.sensor = r.sensor
EMIT CHANGES;
Click on Run query. This executes the stream-table join, and you should shortly see the results of the join. Observe that for each reading the brand name of the sensor from which the reading was taken is included in the output, having been determined by a join to the brands table on the common sensor column.

Leave the query running and open a second browser window. In this new window go to the ksqlDB editor and insert some new rows into the readings stream.
INSERT INTO readings (sensor, reading, area) VALUES ('sensor-2',90,'engine');
INSERT INTO readings (sensor, reading, area) VALUES ('sensor-4',95,'motor');
INSERT INTO readings (sensor, reading, area) VALUES ('sensor-3',67,'engine');
After a moment you should see the result of the stream-table join appear in the window in which you ran the SELECT statement:

Persist the enriched events to a new stream
In the query above the results of the join were output to the screen. ksqlDB can populate new streams with the results from a continuous query (such as the one we saw above). Let’s do that here.
As before, make sure you have set auto.offset.reset to earliest in the drop-down menu, and then run this query:
CREATE STREAM enriched_readings AS
  SELECT r.reading,
         r.area,
         b.brand_name
  FROM readings r
  INNER JOIN brands b
  ON b.sensor = r.sensor
  PARTITION BY r.area
  EMIT CHANGES;
With the stream created, you can query it:
SELECT *
  FROM enriched_readings
  EMIT CHANGES;
With another editor window insert some more events into the readings stream and observe how the events are written to enriched_readings with the brand details added.
INSERT INTO readings (sensor, reading, area) VALUES ('sensor-4',48,'motor');
INSERT INTO readings (sensor, reading, area) VALUES ('sensor-3',19,'engine');
INSERT INTO readings (sensor, reading, area) VALUES ('sensor-2',32,'engine');
If you have access to the Data Lineage view on Confluent you can see a visual representation of what you’ve built:

Delete Your Cluster and ksqlDB Application
- Go to Cluster settings on the left-hand side menu, then click Delete cluster. Enter your cluster's name ("inside-ksqldb"), then select Continue.
- To delete your ksqlDB application, click ksqlDB on the left-hand side menu, then select Delete under Actions. Enter your application's name ("inside-ksqldb"), then click Continue.
Use the promo code KSQLDB101 to get $25 of free Confluent Cloud usage
Be the first to get updates and new content
We will only share developer content and updates, including notifications when new content is added. We will never send you sales emails. 🙂 By subscribing, you understand we will process your personal information in accordance with our Privacy Statement.