Enhance your career, get your certificate as a Data Streaming Engineer | Get your Certificate
How to filter messages in a Kafka topic with Flink SQL
How to filter messages in a Kafka topic with Flink SQL
Prerequisites
- A Confluent Cloud account
- A Flink compute pool created in Confluent Cloud. Follow this quick start to create one.
Tutorial steps
The following steps use Confluent Cloud. See the section at the bottom to run it locally with Docker.
In the Confluent Cloud Console, navigate to your environment and select Flink in the left-hand navigation. Then click the Open SQL Workspace button for the compute pool that you have created.
Select the default catalog (Confluent Cloud environment) and database (Kafka cluster) to use with the dropdowns at the top right.
Run following SQL statement to create a table named publication_events that represents book publications:
CREATE TABLE publication_events (
    book_id INT,
    author STRING,
    title STRING
);
Populate the table with test data:
INSERT INTO publication_events VALUES
(0, 'C.S. Lewis', 'The Silver Chair'),
(1, 'George R. R. Martin', 'A Song of Ice and Fire'),
(2, 'C.S. Lewis', 'Perelandra'),
(3, 'George R. R. Martin', 'Fire & Blood'),
(4, 'J. R. R. Tolkien', 'The Hobbit'),
(5, 'J. R. R. Tolkien', 'The Lord of the Rings'),
(6, 'George R. R. Martin', 'A Dream of Spring'),
(7, 'J. R. R. Tolkien', 'The Fellowship of the Ring'),
(8, 'George R. R. Martin', 'The Ice Dragon'),
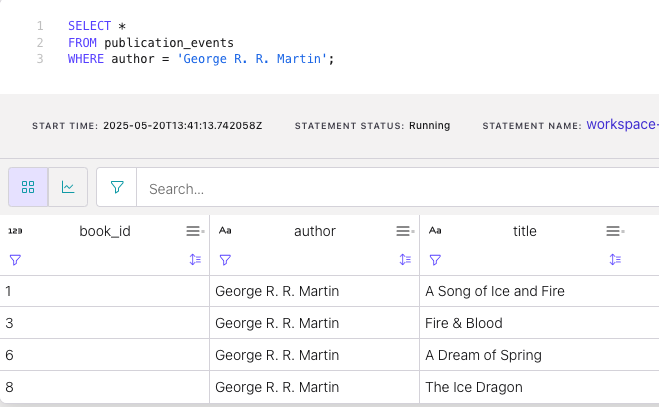
(9, 'Mario Puzo', 'The Godfather');Use the WHERE clause to filter the rows down to the publications written by George R. R. Martin:
SELECT *
FROM publication_events
WHERE author = 'George R. R. Martin';
The query output should look like this:
Docker instructions
Prerequisites
- Docker running via Docker Desktop or Docker Engine
- Docker Compose. Ensure that the command docker compose version succeeds.
Run the commands
Clone the confluentinc/tutorials GitHub repository (if you haven't already) and navigate to the tutorials directory:
git clone git@github.com:confluentinc/tutorials.git
cd tutorials
Start Flink and Kafka:
docker compose -f ./docker/docker-compose-flinksql.yml up -dNext, open the Flink SQL Client CLI:
docker exec -it flink-sql-client sql-client.shRun following SQL statement to create a table named publication_events that represents book publications:
CREATE TABLE publication_events (
    book_id INT,
    author STRING,
    title STRING
) WITH (
    'connector' = 'kafka',
    'topic' = 'publication_events',
    'properties.bootstrap.servers' = 'broker:9092',
    'scan.startup.mode' = 'earliest-offset',
    'key.format' = 'raw',
    'key.fields' = 'book_id',
    'value.format' = 'avro-confluent',
    'value.avro-confluent.url' = 'http://schema-registry:8081',
    'value.fields-include' = 'EXCEPT_KEY'
);
Populate the table with test data:
INSERT INTO publication_events VALUES
    (0, 'C.S. Lewis',          'The Silver Chair'),
    (1, 'George R. R. Martin', 'A Song of Ice and Fire'),
    (2, 'C.S. Lewis',          'Perelandra'),
    (3, 'George R. R. Martin', 'Fire & Blood'),
    (4, 'J. R. R. Tolkien',    'The Hobbit'),
    (5, 'J. R. R. Tolkien',    'The Lord of the Rings'),
    (6, 'George R. R. Martin', 'A Dream of Spring'),
    (7, 'J. R. R. Tolkien',    'The Fellowship of the Ring'),
    (8, 'George R. R. Martin', 'The Ice Dragon'),
    (9, 'Mario Puzo',          'The Godfather');
Use the WHERE clause to filter the rows down to the publications written by George R. R. Martin:
SELECT *
FROM publication_events
WHERE author = 'George R. R. Martin';
The query output should look like this:
     book_id                         author                          title
           1            George R. R. Martin         A Song of Ice and Fire
           3            George R. R. Martin                   Fire & Blood
           6            George R. R. Martin              A Dream of Spring
           8            George R. R. Martin                 The Ice Dragon
When you are finished, clean up the containers used for this tutorial by running:
docker compose -f ./docker/docker-compose-flinksql.yml down