Enhance your career, get your certificate as a Data Streaming Engineer | Get your Certificate
Agentic AI Part 1 of 2: LLM model and MCP tool setup in Confluent Cloud
Agentic AI Part 1 of 2: LLM model and MCP tool setup in Confluent Cloud
In Part 1 of this tutorial series, you will set up and test the infrastructure and third-party dependencies required for an agentic AI use case: a listener that creates concise tasks in a project management platform based on customer communications. This is a prime example of integrating tools in a model: LLMs are strong at summarizing a customer's natural language, but they lack awareness of your organization's project management platform and the context and connectivity needed to integrate with such an external system. You will use OpenAI as the model provider in Confluent Cloud and Linear as the SaaS project management platform (the tool for the model to call). Linear is similar to Jira or Asana.
After you finish this tutorial, in Part 2 of the series you will continue to build and evolve a Streaming Agent for this use case.
Prerequisites
- A Confluent Cloud account
- The Confluent CLI installed on your machine
- Node.js and npm to inspect Linear's MCP server
- jq for parsing JSON on the command line
Create Confluent Cloud resources
Log in to your Confluent Cloud account:
confluent login --prompt --saveInstall a CLI plugin that streamlines resource creation in Confluent Cloud.
confluent plugin install confluent-quickstartRun the plugin to create the Confluent Cloud resources (Kafka cluster and Flink compute pool) needed for this tutorial. Note that you may specify a different cloud provider (gcp or azure) or region. You can find supported regions in a given cloud provider by running confluent kafka region list --cloud <CLOUD>. The plugin should complete in under a minute.
confluent quickstart \
  --environment-name agentic-ai-env \
  --kafka-cluster-name agentic-ai-cluster \
  --compute-pool-name agentic-ai-pool
Since you are running the plugin to create infrastructure but not generate any client configuration files, you will see final output like the following once it successfully completes:
No config files were created (no resources were created)
Quickstart complete. Exiting.
Set up OpenAI account and create credentials
Create an OpenAI account if you don't already have one.
You will need OpenAI credits in order to complete this tutorial. Add credits here (credit card required). Adding the minimum amount of credits will be sufficient.
You will need an OpenAI API key in order to call the model from Confluent Cloud. Navigate to the Project API keys page and click Create new secret key. Save this key because you will need it later when creating a remote model in Flink.
Set up Linear account and create credentials
Sign up for a free Linear account (no credit card required). As part of the signup flow, you will be prompted to create a workspace. Give your workspace a unique name and select the region that makes sense for you. Click through the quick start prompts until you get to your workspace home page.
You will need a Linear API key in order to call Linear as an MCP-based tool from Confluent Cloud. To create a key, click the workspace dropdown at the top left, then Settings. Select Security & access in the left-hand navigation, followed by New API key under Personal API keys. Give the key a name. Under Permissions, select Only select permissions... and then only check the boxes for Read and Write. Click Create. Save this API key.
Create OpenAI and Linear connections
In order to create a remote model or MCP tool in Confluent Cloud, you will need to provide a connection to an external service as a parameter, so in this step we will create the prerequisite connections.
To create connections to OpenAI and Linear, start a Flink SQL shell:
confluent flink shell --compute-pool \
  $(confluent flink compute-pool list -o json | jq -r ".[0].id")
Paste your OpenAI API key into the following statement to create a connection to OpenAI's Chat Completions API:
CREATE CONNECTION `openai-connection`
  WITH (
    'type' = 'openai',
    'endpoint' = 'https://api.openai.com/v1/chat/completions',
    'api-key' = '<OPENAI_API_KEY>'
  );
The connection is successfully created when you see output:
Finished statement execution. Statement phase: COMPLETED.
The server returned empty rows for this statement.
Next, create a connection to Linear's MCP server. Linear offers both streamable HTTP and SSE-based MCP endpoints. Paste your Linear API key into the following statement to create a connection to Linear's streamable HTTP MCP server:
CREATE CONNECTION `linear-mcp-connection`
  WITH (
    'type' = 'MCP_SERVER',
    'endpoint' = 'https://mcp.linear.app/mcp',
    'transport-type' = 'streamable_http',
    'token' = '<LINEAR_API_KEY>'
  );
Validate that both connections have been created:
SHOW CONNECTIONS;You will see:
+-----------------------+
|    Connection Name    |
+-----------------------+
| linear-mcp-connection |
| openai-connection     |
+-----------------------+
Inspect the Linear MCP server
In this section you will inspect Linear's MCP server to see which tools are available and what parameters they require. You'll need to know this information when invoking the tool in a later step.
Run the following command from your terminal (not the Flink shell) to start an MCP server inspection utility:
npx @modelcontextprotocol/inspector@latestIn the form on the left, select the Streamable HTTP Transport Type, enter https://mcp.linear.app/mcp as the URL. Expand the Authentication dropdown and, in the Custom Headers section, enter your Linear API key as the Bearer header.
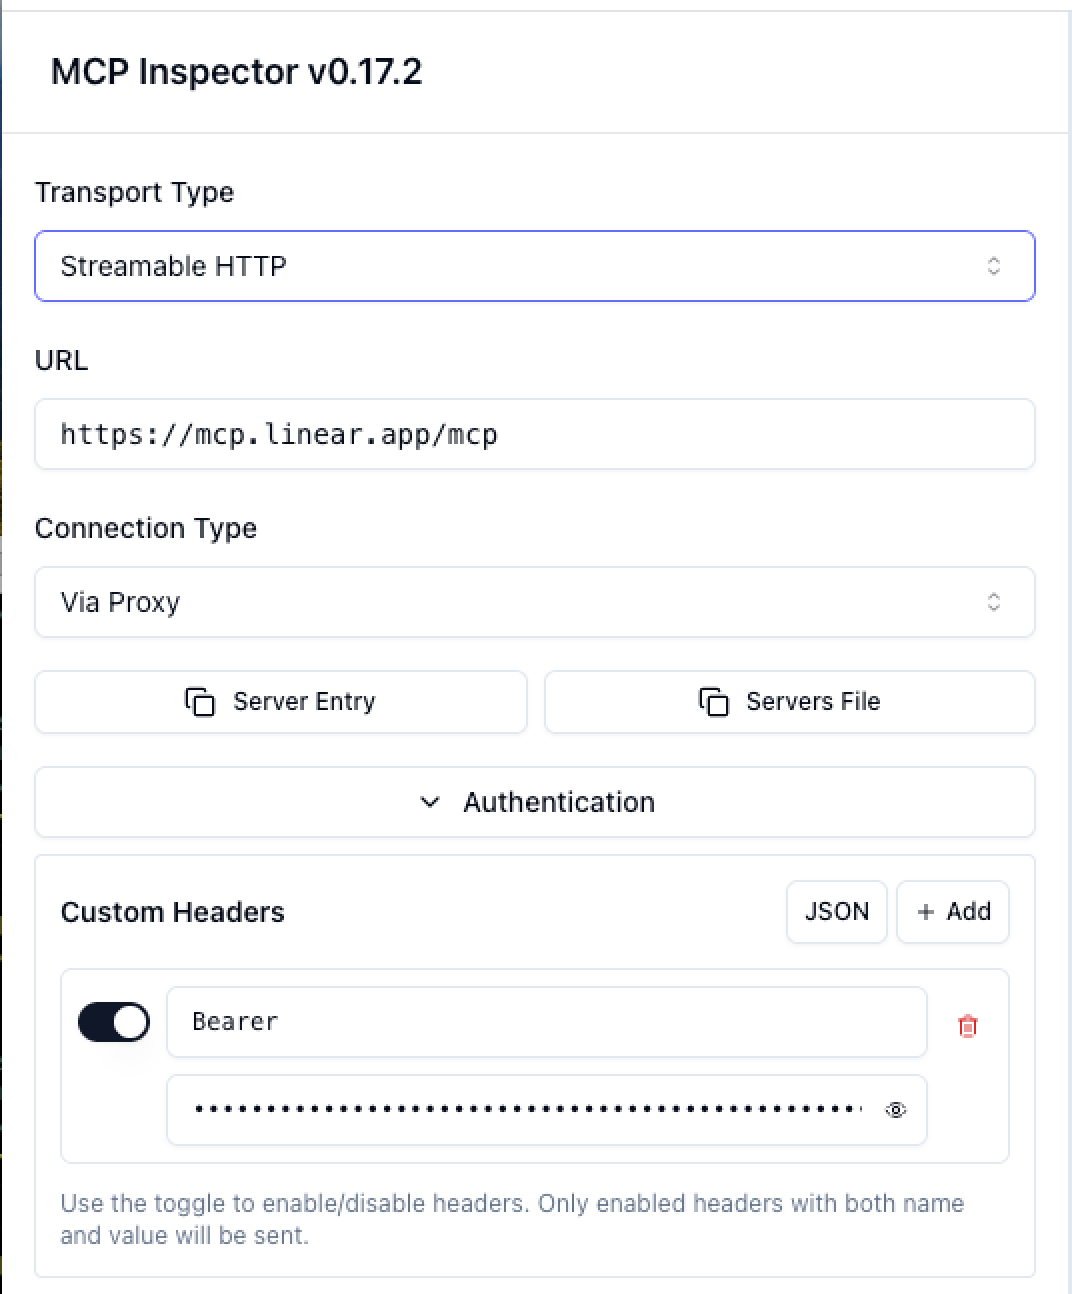
Scroll down, click Connect, and then Approve when you see the message MCP Inspector is requesting access. You'll also be prompted to select your Linear workspace.
Once you're connected, click List Tools. These are the tools at our disposal to build an agentic AI workflow. We're going to focus on issue creation, so note that there is a create_issue tool. Click that to see the fields required to create an issue.
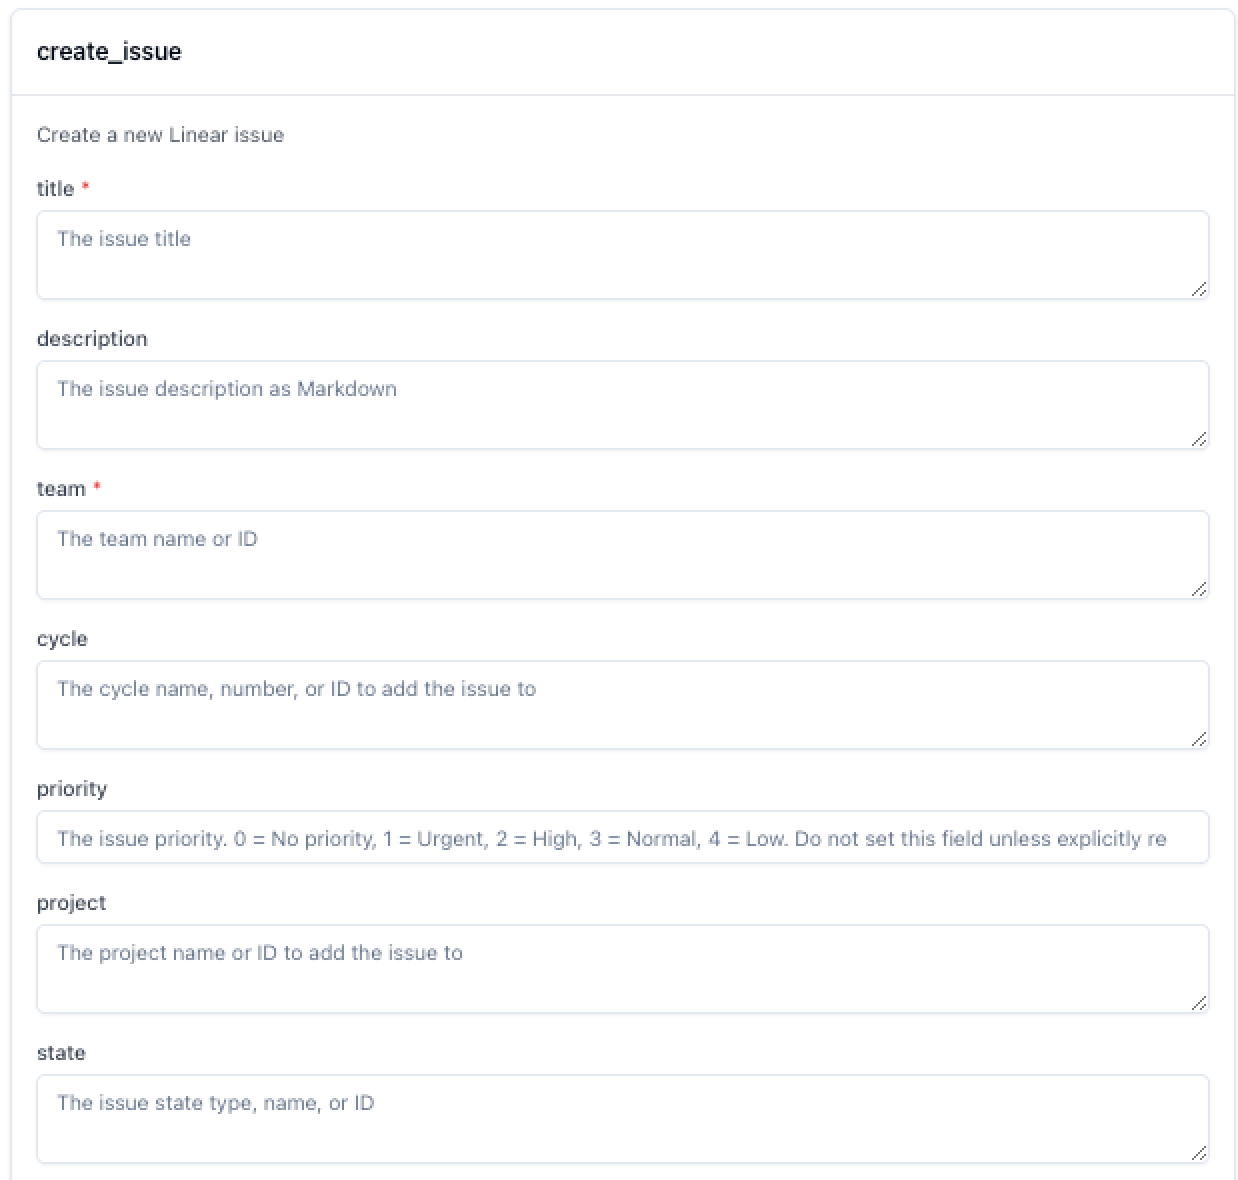
You'll notice a required team field that you must provide when calling the tool. You can get your team ID (a GUID) by running the following command from your terminal. Be sure to substitute your Linear API key:
curl \
  -X POST \
  -H "Content-Type: application/json" \
  -H "Authorization: <LINEAR_API_KEY>" \
  --data '{
    "query": "query Teams { teams { nodes { id name } }}"
  }' \
  https://api.linear.app/graphql | jq -r ".data.teams.nodes[0].id"
Create models
In the Flink SQL shell, create a gpt-4o model using the OpenAI connection created earlier:
CREATE MODEL chat_listener
INPUT(prompt STRING)
OUTPUT(response STRING)
WITH (
  'provider' = 'openai',
  'task' = 'text_generation',
  'openai.model_version' = 'gpt-4o',
  'openai.connection' = 'openai-connection'
);
Next, create a similar LLM model, but this time also provide the MCP server connection. This is the model that we will use to invoke Linear's create_issue tool in the next step.
CREATE MODEL linear_mcp_model
INPUT(prompt STRING)
OUTPUT(response STRING)
WITH (
  'provider' = 'openai',
  'task' = 'text_generation',
  'openai.model_version' = 'gpt-4o',
  'openai.connection' = 'openai-connection',
  'mcp.connection' = 'linear-mcp-connection'
);
Validate that both models have been created:
SHOW MODELS;You will see:
+------------------+
|    Model Name    |
+------------------+
| chat_listener    |
| linear_mcp_model |
+------------------+
Test models and tool invocation
First, test the base LLM that doesn't call any tools:
SELECT
  prompt,
  response
FROM
  (SELECT 'What is a good family friendly dog breed? Answer concisely with only the most recommended breed.' AS prompt) t,
LATERAL TABLE(AI_COMPLETE('chat_listener', prompt)) as r(response);
You should see output like the following. It may take some time (10-15 seconds) to show up in the query results screen. Your output may be different because the underlying model is nondeterministic.
prompt                                           response
what is a good family friendly dog breed? ...    Labrador Retriever
Next, test MCP tool invocation with the following command. Substitute your Linear team ID.
SELECT
AI_TOOL_INVOKE(
'linear_mcp_model',
'Create an issue from the following text using <LINEAR_TEAM_ID> as the team ID. I can''t log in to the online store. It says that my account has been locked out. When I try the forgot password route, I don''t get an email to reset it. Please help!',
MAP[],
MAP['create_issue', 'Create a new issue'],
MAP[]
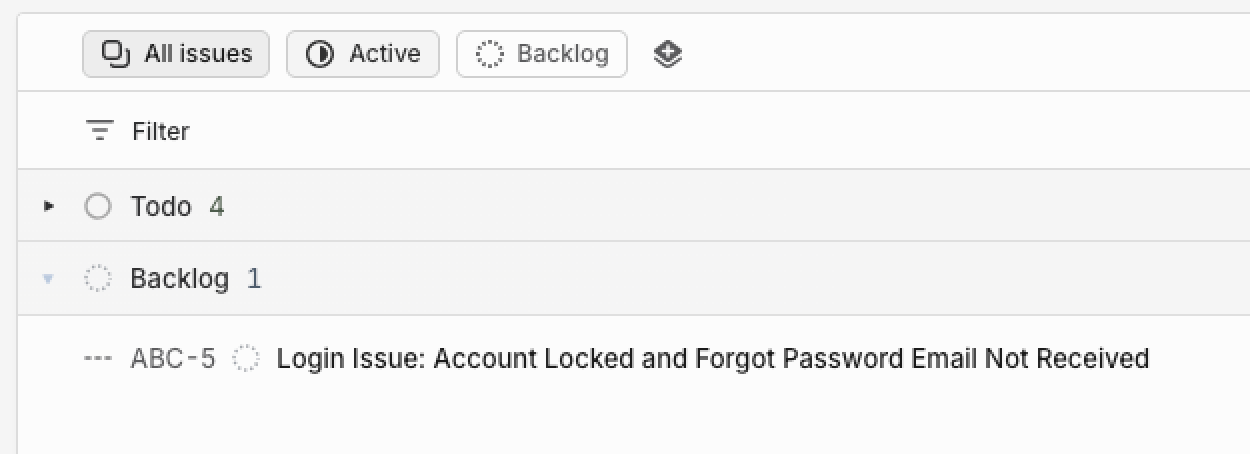
) as response;You should see a JSON response indicating the status as well as the action taken. In the Linear web app, click All issues and you will see a new ticket in the backlog summarizing the issue:
Wrap up
Now that we have created a model and tools and verified that they work as expected, proceed to Part 2 of this tutorial series.
If you aren't continuing, delete the agentic-ai-env environment to clean up the Confluent Cloud infrastructure created for this tutorial. Run the following command in your terminal to get the environment ID of the form env-123456 corresponding to the environment named agentic-ai-env:
confluent environment listDelete the environment:
confluent environment delete <ENVIRONMENT_ID>