Enhance your career, get your certificate as a Data Streaming Engineer | Get your Certificate
Hands On: Introduction and Environment Setup


Tim Berglund
VP Developer Relations
Hands On: Introduction and Environment Setup
In this exercise, you will set up the necessary environments for the exercises in the rest of this course. Before we even do that, let’s talk about what we’re even going to be building.
The example streaming data pipeline that we’re going to build during this course is driven by a stream of events arriving with information about product ratings that users submit to our fictional company’s website.

In reality, the ratings would be written from the website to Apache Kafka® using the producer API. For the purposes of our tutorial though, this data is going to come instead from a data generator that we’ll set up in a later step.
Each of the ratings that we receive has a user_id field. We can use this to look up information about the user so as to enrich the data that we’ve received and take timely action on it. For example, each user has a name and contact details and is also assigned a VIP status. If we have an important customer leave unhappy reviews, then we probably want to take action so as not to risk them churning. The information about customers is held in a separate system—it’s a fair bet that it’s going to be an RDBMS of some sort. The general pattern to follow with streaming pipelines is to get the data into Kafka and join it to the events there. We’ll get onto why this makes sense later on and talk about exciting things like stream-table duality.

Using stream processing, we can join each event that we’ve already received, and every new one that arrives, to its associated customer data. The resulting enriched information is written back into a Kafka topic and then streamed to the target system where it can be used in an operational dashboard.

Confluent Cloud
For this course, you will use Confluent Cloud to provide a managed Kafka service, connectors, and stream processing.
-
Go to Confluent Cloud. If you don’t already have a Confluent Cloud account, you can create one here. Use the promo code PIPELINES101 for an additional $25 of free usage (details). You can also use the promo code CONFLUENTDEV1 to delay entering a credit card for 30 days.
-
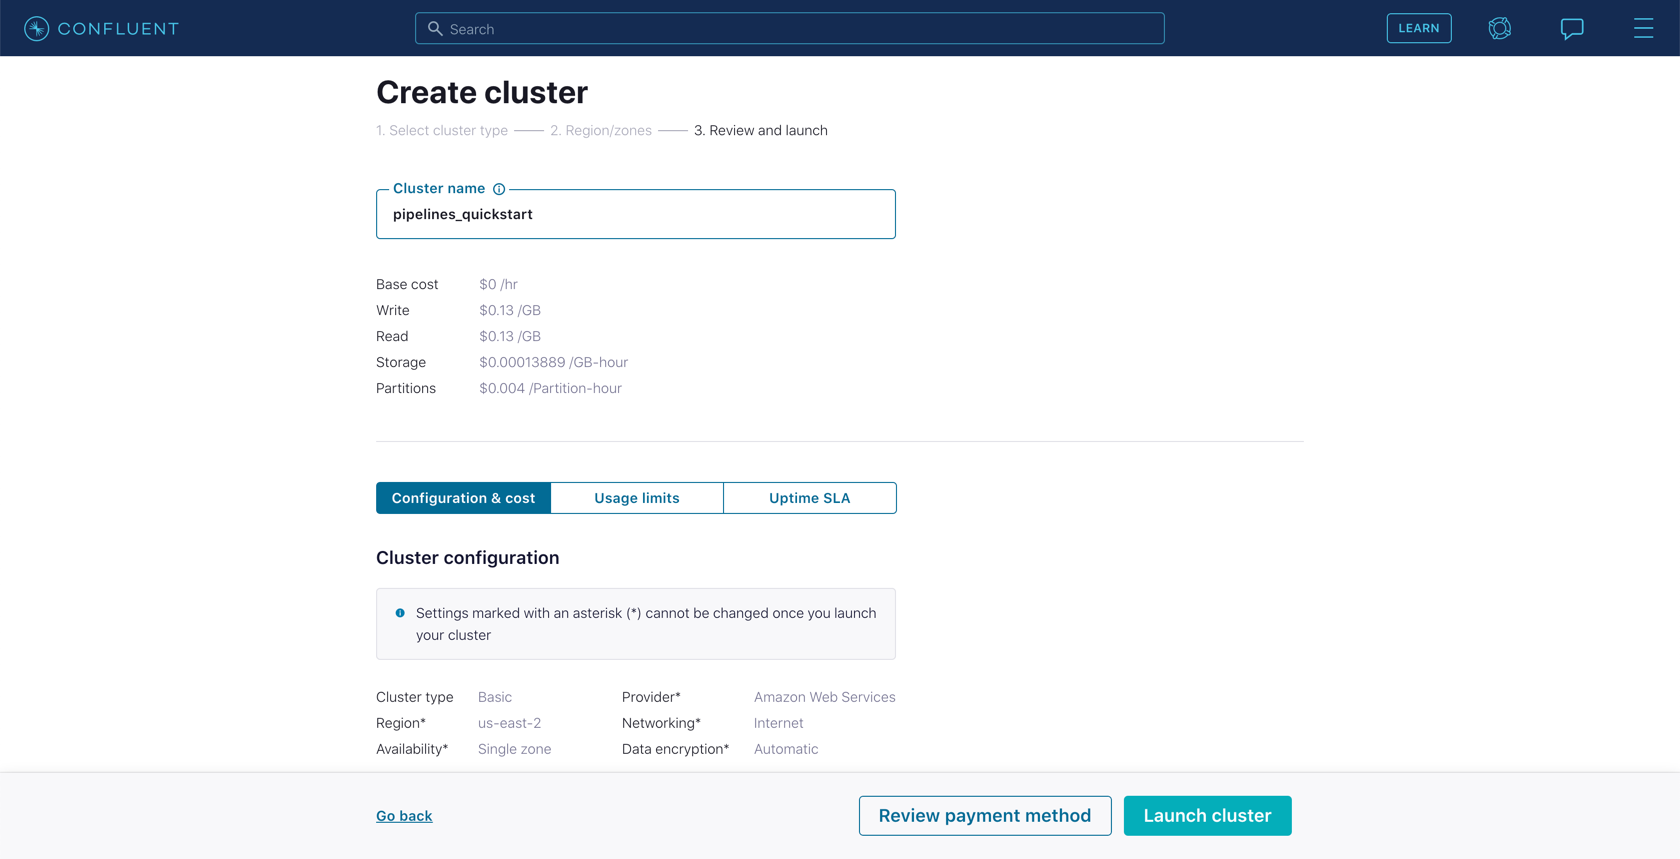
Create a new cluster in Confluent Cloud. For the purposes of this exercise, you can use the Basic type. Name the cluster pipelines_quickstart.
-
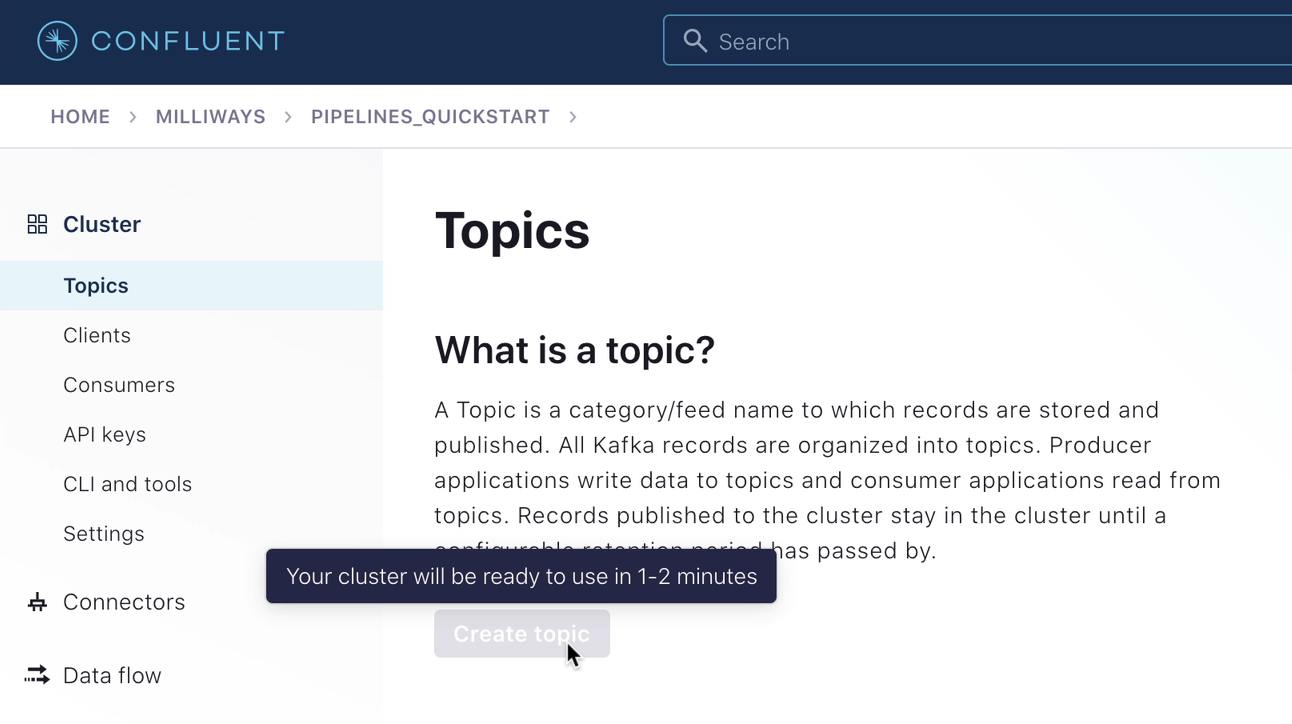
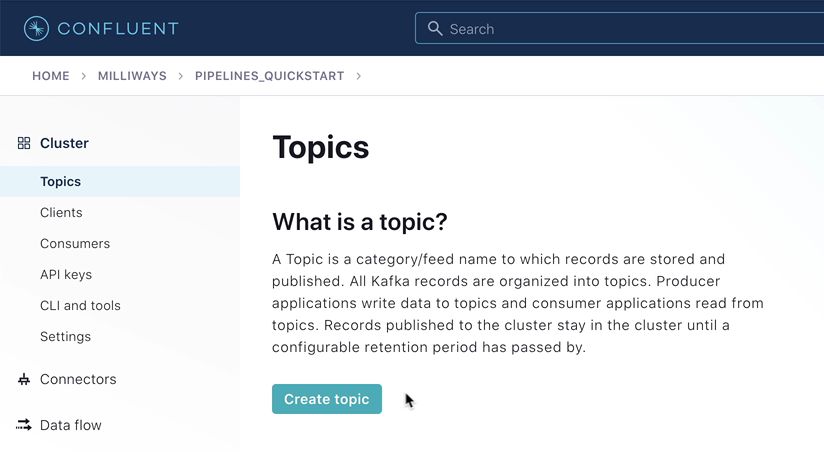
Once the cluster is created, you need to make sure that it has finished initializing before going to the next step. To do this, go to the "Topics" page and wait for the Create topic button to become available.


Next, you need to create a Confluent Schema Registry for your environment.
Note
If you already have a Schema Registry in your Confluent Cloud environment, you can skip to step 6.
- From the Schema Registry option on your environment’s homepage (or from the left-hand navigation on the "Cluster" page), click on Set up on my own.

- Select a cloud platform and region, and click Continue.

-
Now that you have a Schema Registry established in your Confluent Cloud Environment, go to the ksqlDB page within it and click **Add application**.
If prompted, select Create application myself.
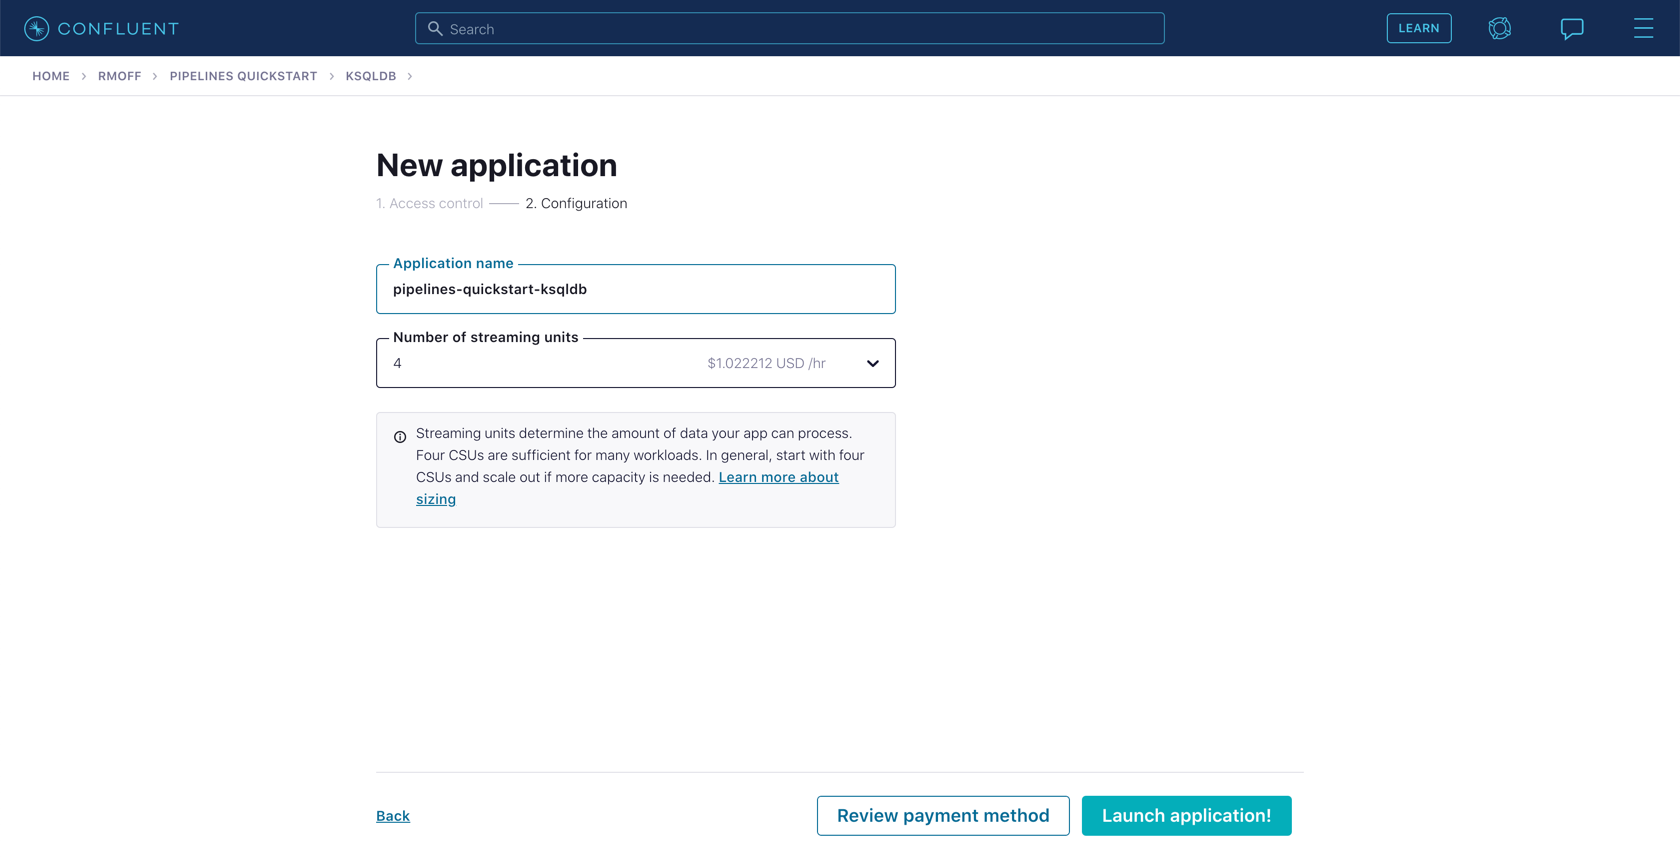
Leave the access control set to "Global access." Make the application name pipelines-quickstart-ksqldb, and leave the number of streaming units set to "4."
The ksqlDB application will take a few minutes to provision.

Note
Make sure that when you have finished the exercises in this course you use the Confluent Cloud UI or CLI to destroy all the resources you created. Verify they are destroyed to avoid unexpected charges.
Source and Target Systems
This course uses a source MySQL database and target Elasticsearch instance. Both of these should be accessible from the internet.
The provision and configuration of these systems is primarily outside the scope of this exercise. These could be run as managed services (for example, Amazon RDS and Elastic Cloud), or as self-hosted with the appropriate networking configured such that they can be connected to from the internet.
MySQL
Follow this guide to set up an Amazon RDS managed MySQL instance.
Note: Setting up your MySql database using the above guide results in the following settings being established which the exercises in this course requires. If you do not use the above guide, be sure to at a minimum establish these same settings for your MySql database.
- Public accessibility is set to yes
- log_bin is set to ON
- binlog_format is set to ROW
- binlog_row_image is set to full
Regardless of how you provision your MySQL database, run this script to create the table and data used in this course. If you’re using the mysql CLI, you can do it like this:
https://raw.githubusercontent.com/confluentinc/learn-kafka-courses/main/data-pipelines/customers.sql | \
  mysql -u admin -h $MYSQL_HOST -p
Elasticsearch
You can run Elasticsearch yourself, or use a managed service such as Elastic Cloud.
Use the promo code PIPELINES101 & CONFLUENTDEV1 to get $25 of free Confluent Cloud usage and skip credit card entry.
Hands On: Introduction and Environment Setup
Let's walk through an example of streaming data pipeline that we're gonna build during this course. It's driven by a stream of events, holding information about product ratings that users submit to our fictional company's website. We appreciate their input. In reality, the ratings would be written from the website to Kafka using the producer API and they be coming from probably some JSON thing from the react front end or the mobile app or whatever, you know. But for purposes of our tutorial, the data is gonna come through the data generator. That's a fully managed connector in Confluent Cloud. We'll set that up in a later step. It's actually really super handy for things like this. I love the fact that it's a part of Confluent Cloud. It makes learning and playing around so much easier. Now, each of the ratings that we receive has a user ID field. We can use this field to look up information about the user. So as to enrich the data we've received and take timely action on it. For example, each user has a name and contact details and is also assigned of a VIP status. If we have a really important customer, leave unhappy reviews, then we might wanna prioritize that. So as to take action and not risk them churning. The information about customers is held in a separate system, that's reasonable. It's a fair bet, it's gonna be a relational database of some sort. The general pattern to follow with streaming pipelines is to get that data into Kafka and join it to the events there. It just works so much better to do that. You actually have a system that functions asynchronously, if you're not going out and dipping into a database for each message. And we'll give some more why about that later on and talk about the exciting things like stream table duality in later lessons. Using stream processing, we can join each event that we receive and every new one that arrives to its associated customer data. The resulting enriched information is written back into a Kafka topic and then streamed to the target system where it can be used in an operational dashboard. That's where we're gonna end up at the end of example six at the end of this course. So our fictional company has a fictional website where users can leave fictional ratings about fictional products. I'll stop saying fictional. Let's just let that be assumed that this is all made up, but that's the deal. They leave ratings on our products on our website. We know things about them, contact information and status, a VIP status, so we can make a decision about, I guess, how to rate their feedback. And that's kinda what we're gonna be doing in this pipeline. So there's a stream of events that's being produced by a data generator and that data generator is implemented as a connector in fully managed Kafka connect. There's also a table in an external relational database that holds the customer data. That's pretty sensible, right? That would probably live in a database and a table in a database somewhere, that makes sense. And we'll wanna bring that table in to Kafka. That's generally what you do. You bring the relational data in and do the join inside of the stream processing capabilities of Confluent Cloud and we'll see how all that unfolds. Then we're gonna write the resulting join data back into a Kafka topic and output it to a system, on which we can build a nice operational, real-time dashboard. First, we're gonna create a new cluster. This assumes you're already logged in and you've entered your promo code, obviously. But we need to wait a little bit for the cluster to initialize and a good way to do that is to go check the topics page. Create topics should not be grayed out. If it is, then wait for it to not be. And once it's not be, we can move forward. We'll also set up Schema Registry. Conflict Cloud provides the fully managed Schema Registry to hold details of the schemas in your data. We need to provision one before doing anything else. You can find a link to Schema Registry from the left hand nav or from the environment homepage that we can see here. Follow the prompts to create one, choose your cloud and region and you're all set. We're gonna use ksqlDB to do stream processing during this course. For now, you need to provision a ksqlDB application for us to use later on. Click on the ksqlDB link on the left-hand nav and follow the prompts for create application myself. Because this is just a sandbox application we're building, we can go with global access. It's just so much easier. There's a lot of stuff you don't need to worry about. Give the application the name shown and then click launch application. This takes a few minutes. So, go get a cup of coffee or tea or stretch your legs and we'll come back to it later to use for the next exercise. Now, do be careful with this because ksqlDB costs something to run, to have that application running. So if you've entered your promo code and you've got your credit running and maybe you've got your new sign-up credit all there, that's very good. We want you to be able to use and learn and not have to pay when you're in this phase, but leaving that running for a long time can eat that credit up, so keep that in mind. If you can do the rest of these exercises at a time that you can really sit down and crank through them all, that'll all happen within the promo code credit. And it'll be great. If you leave it running for a few days, maybe not. So note of caution. As well as Confluent Cloud, you're gonna need to have a MySQL and Elasticsearch instance available. There are several options here, but the important thing is that they must be accessible from the internet. You can't just be on your laptop. So, you can use a cloud solution or run it yourself, if you have made that publicly accessible in some way. Here's what I'm using for MySQL. A managed MySQL service on AWS called RDS. Their instructions linked in the exercise details, if you'd like to set this up yourself. If you do run it yourself, you'll need to configure it to work with Debezium. Wherever you host MySQL, make sure that you add the sample data to it for this exercise. The SQL statements to run are linked in the exercise notes. Once you've done this, you should see a customer's table in your database, which we're gonna use later. Just like with MySQL, you can use elastic in a managed service. This is Elastic Cloud that you can see here or you can run it yourself, if you're really into that kind of thing. You do need to make sure that it's publicly accessible from the internet though. So again, probably not on your laptop, unless you've got some cool stuff set up on your router and you're doing all kind of thing. So, that's the basic setup that you'll wanna go through that tees you up to be able to do everything else you're gonna need to do in exercises two through six. This link here gets you to Confluent Cloud. So if you've just watched this and you still haven't signed up for Confluent Cloud, this gets you to the signup page and enter that promo code, PIPELINES101. That'll give you an extra $101 of free usage, which again, if you've chiseled off a little bit of time, you're gonna sit down and work through these exercises on a Saturday or an afternoon and evening or sometime like that, spending some fun time, learning how to do a data pipeline, this $101 will get you there, no problem. So sign up, get started today. We'll see you in the next lesson.
Be the first to get updates and new content
We will only share developer content and updates, including notifications when new content is added. We will never send you sales emails. 🙂 By subscribing, you understand we will process your personal information in accordance with our Privacy Statement.